madness returns: deflect (1)

What's an Alice cosplay without her trusty weapons?

The first "weapon" I set out to make is not really a weapon, it's more of a shield if we want to get down to specifics. There aren't many reference images of this item on the web, I basically had to pay extra attention during the game and come up with my own interpretation.


something... like that... image via Alice:Madness Returns wikia


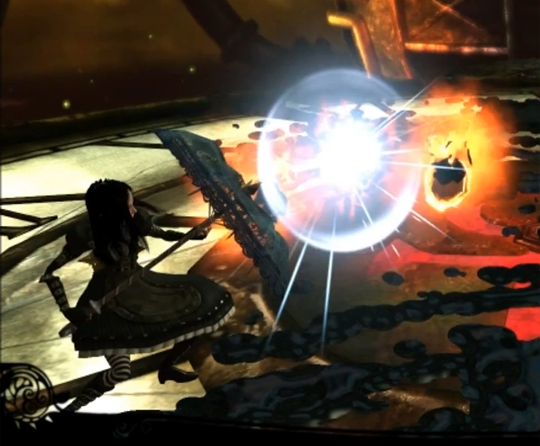
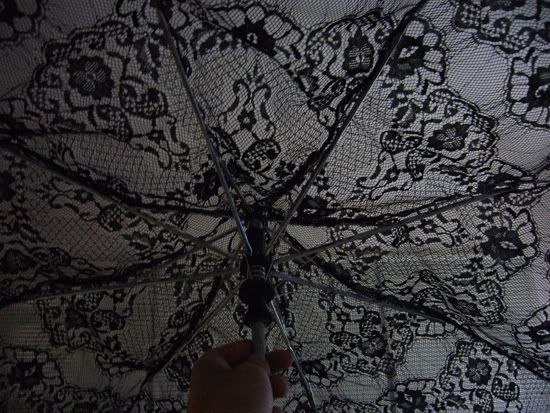
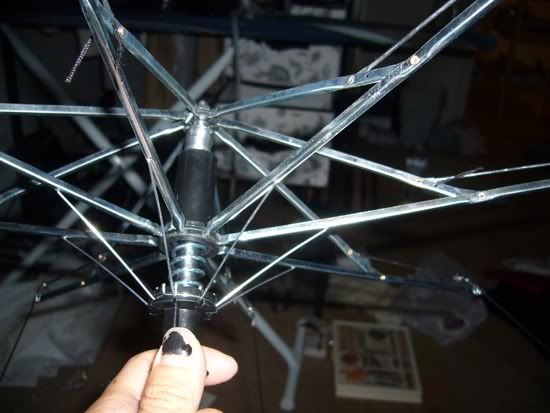
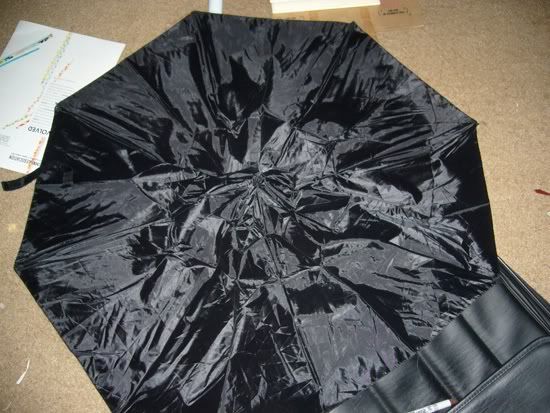
I started with a cheap store-bought umbrella. I think it was $8. You can see how ridiculously long the handle of her umbrella is. My umbrella has a very short handle. First things first--I carefully removed the nylon from the umbrella. You can see that this umbrella is tacked in 3 places, goddamn this was a cheap umbrella.


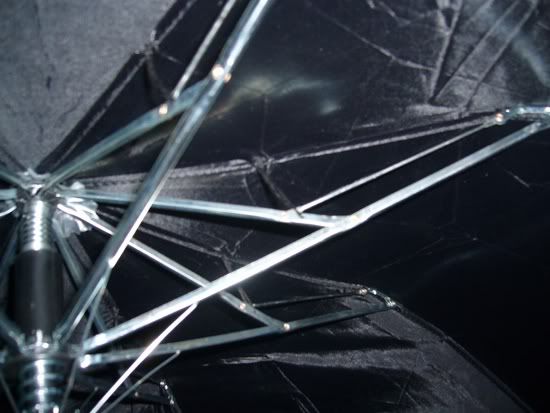
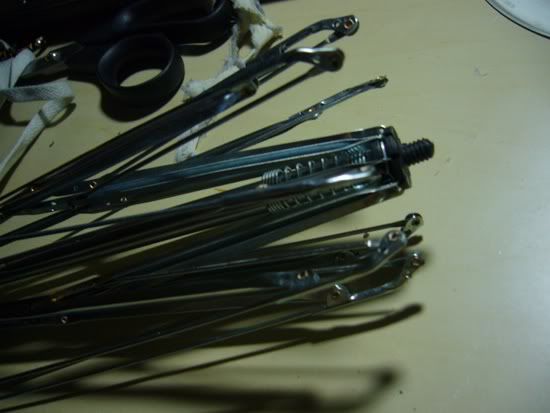
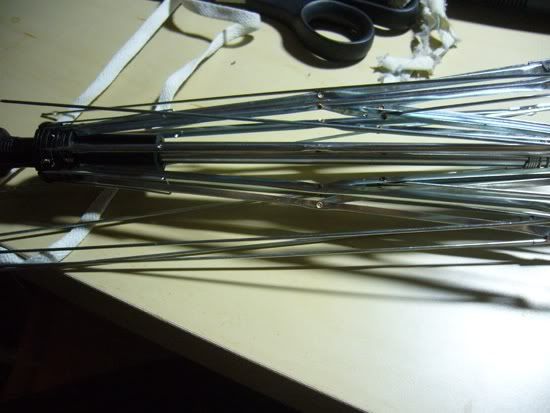
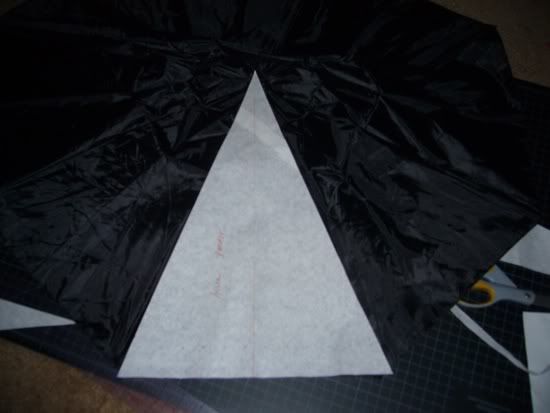
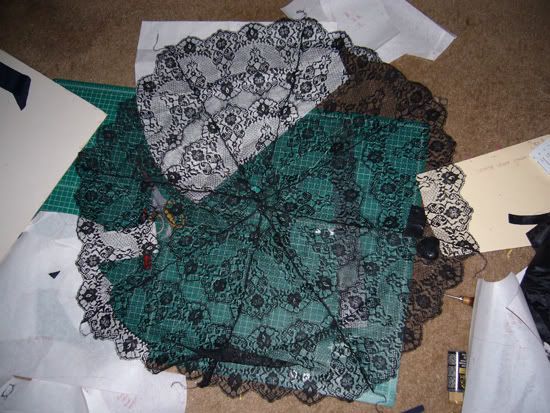
Now you have the skeleton of the umbrella. And the entire nylon piece is basically a circle, made up of 8 triangles. I measured the width of each piece, which in my case happened to be 13". From the center to the edge, the length of each triangle was 18.5". Easy pattern.


I went with this type of lace pattern since I wanted the repeat to be large enough to be noticeable, and based on the reference images/gameplay it seems like the floral patterns in the lace are pretty big, and are arranged in rows. This was also how I cut the fabric. I wanted the edges to be scalloped (again, based on the ref. images and gameplay), so I positioned my pattern like so.


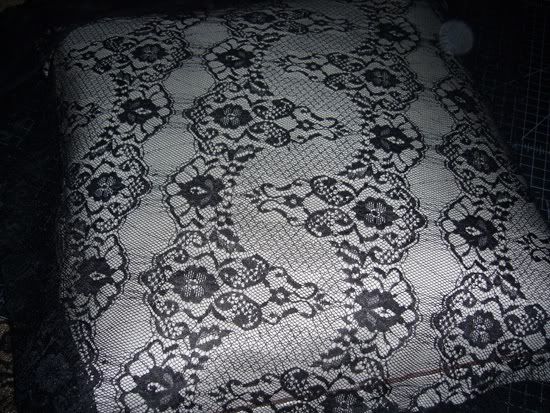
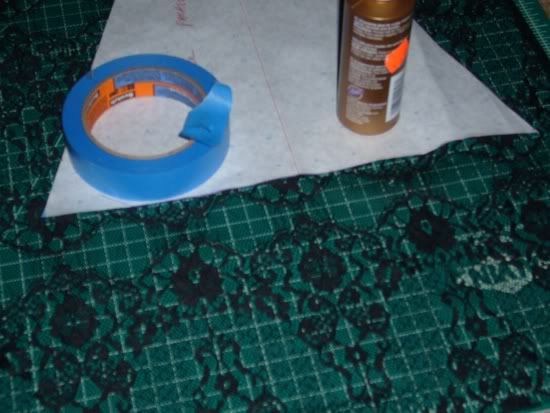
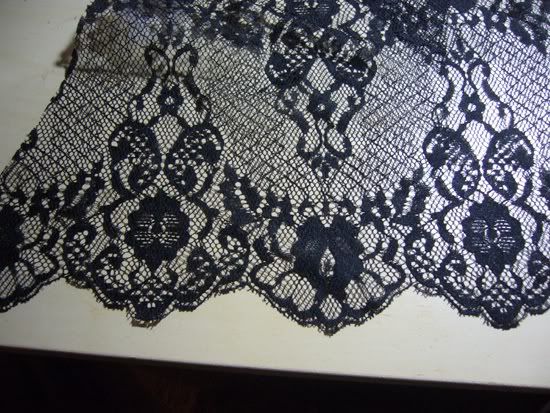
This lace had a bit of stretch to it, so it's pointless to pin (look at all the open weaves) and the chalk is going to leave too little of an impression. I use weights to keep the stretch lace from shifting, both on the pattern and on the area around the pattern. You can get legitimate fabric weights at the crafts store but I was kind of lazy and just used whatever heavy, small objects I had lying around.


To neatly cut the scallop shape I used a pair of embroidery scissors. I have those expensive Gingher scissors (they were a gift) but from my uber-last-minute cosplay midnight scramble at PAX2011 I learned that facial hair trimming scissors are a cheap and great alternative....

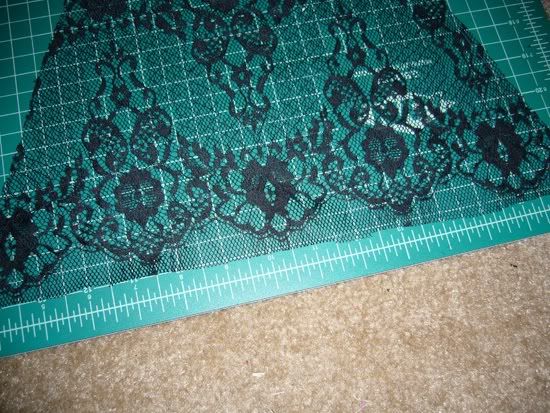
The next thing to do, obviously, is to sew these pieces together. I overlocked the edges using my serger, trying to match the scalloped edges as best as possible. The center of the umbrella didn't have to be finished too cleanly because I was going to sculpt a new tip anyways.


But before I could permanently attach the lace to the skeleton I had to color the frame of the umbrella.

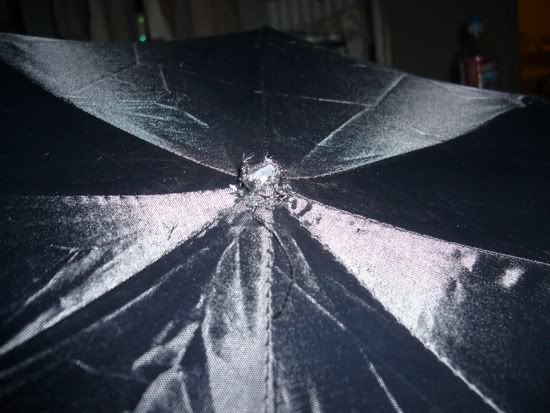
Here's what it looks like so far.


Spotlight on Instructables

Hello, internet. It is I, Sabine! Did you miss me? I certainly missed you.

Today, I want to showcase a website that is near and dear to my heart: Instructables. Within its many pages, you can find so many well designed, well photographed tutorials for, well, everything that it's just absurd. Here are a dozen or so choices for really neat costume and prop tutorials, ranging from super simple to super involved. Ready? Let's begin!

For a really slick looking costume piece, how about Amber's jacket from Suckerpunch?

On the prop side, there are dozens of versions of Iron Man's arc reactor, but this one, featuring a cool infinity effect, is my favorite.

This was a triumph: an amazing replica of Chell's portal gun.

Another epic (literally) prop: Thor's hammer, made from a dying star (sort of).

Weapons geeks of all kinds, here's a whole category for you: Nerf gun mods. A little something for everyone, including vampire hunters and steampunkers.

Captain America fans: trying to replicate that goddamn shield on a budget? Here's one made of duct tape and cardboard that still looks great.

If you've got a lot of time on your hands and love Doctor Who more than life itself, you can make your very own K-9.

Here's a utility sort of tutorial that has limitless applications: DIY scales with spray paint.

If you're into steampunk or innovative original costuming in general, one to watch is ModMischief.

Speaking of steampunk, if you want costume pieces, look no further. For example, here's a neat little wristwatch, so you can check the time in your airship.

Another Doctor Who note: looking for a sonic screwdriver that's all your own? Here's one you can make for about five bucks.

If we have taught you anything, may it be that you don't have to start from scratch to make a cool costume piece. Here's a mod for a glowing Green Lantern ring out of one you can pick up at Toys-R-Us.

Video game costume tutorials run rampant on Instructables, and here's a really cool one: a costume from Dead Space 1.

And, last but not least, knit your way to Doctor Zoidberg. Whoop whoop whoop whoop whoop!

I hope you enjoy/are inspired by these few little examples, and that you'll go exploring on your own. Geronimo!

-Sabine

Chocolate Misu's Red Hot Summer


click the picture for a larger view!
To tell the truth, I prefer Tira Misu over Chocolate, but my sketch of Tira in her swimsuit did not turn out as nice as I imagined, so I only completed this drawing XD.

I love Rei Omishi's art style, it was the main draw for reading the Sorcerer Hunter comics.

Cosplay Linkspam, 27 September 2011

Greetings, fellow cosplayers! Shadowen, here. Remember me? Possibly not, seeing as I’ve been MIA for so long. The good news, though, is that I have ALL THE LINKS for you today, including more stuff from Dragon*Con, some cosplaying resources, and a blast from the costuming past.

First up, we have Cosplay.com and The Superhero Costuming Forum, for those of us who like a little social networking with out cosplay. Cosplay.com looks to be heavy on the anime, and the SCF does pretty much what it says on the tin. these are probably old news, but I wasn’t aware of them, so I’m passing on the info to you, my loyal readers. Check them out!

If you’re hardcore DIY, or you just like seeing how stuff is made, go here to learn how to make your very own Daft Punk helmet, then wear it to the club and see if anyone asks for your autograph.

Also in the realm of rock’n’roll costuming - and reminding us that cosplay isn’t just about our beloved SF/F - check out this stunning Velvet Goldmine/David Bowie cosplayer. One costume, twice the glam!

To thrill my little vintage geek heart, The Azarian Collection has a big photo gallery of costumes from our favorite campy 60s superhero shows, including pieces from Lynda Carter’s Wonder Woman costume, plus links to other geek retro sites.

Shadowen =/= gamer, but I salute my otherly nerdy brethren and respectfully point you to this detailed and entertaining primer for PAX in Seattle.

For my fellow fans of Neil Gaiman’s Sandman - and for anyone else who likes pretty things - check out these lovely masks inspired by the Endless.

Are you now or have you ever been a Hench(person) of the Mighty Monarch? If so, The Venture Home News is asking you to send in photos and video of your adventures in villainy, presumably for a promotional spot on the glamorous life of henching.

AND NOW: more Dragon*Con

The winners of the Hallway Costume Contest were posted, sadly without pictures.

Comics Alliance has their pick of the best costumes from the con, including the truly amazing Grand Galactic Inquisitor as photographed by friend of the blog arymabeth.

And here’s a Flickr set of photos from D*C.

For extra entertainment, we have Chad Vader’s 75 more costumes at Dragon*Con 2011.

And finally, The Really Really Long Video from Dragon*Con 2011.

Time to start working on costumes for next year! ....after I pay rent.
-shadowen

Angkoters

Sinar matahari itu menyilaukan mataku
Terlihat seperti lampu disko yang terus berkelap-kelip
Selama angkot ini berjalan terus melewati jajaran ruko, gedung dan pepohonan
Di sinilah aku sore ini
Dengan pikiran yang melayang entah kemana
Masih diangkot yang terjebak macet dan diselimuti rasa bosan
Perjalanan ini berasa tak kunjung berakhir


Krik krik tadi bongkar-bongkar notes malah nemu coretan ini
Bingung mau dikasi judul apa
Hihi yang iyanya lagi males mikir buat tulisan baru :p

Vegan Pineapple Coconut Layer Cake :: OMG


Cake:
2 1/2 cups flour
2 tsp baking powder
1/2 tsp baking soda
1/2 tsp salt
1/2 cup vegan margarine (Earth Balance for example)
1 cup sugar
3/4 cup soft or silken tofu
1/4 cup "milk" (soy, rice, almond...)
1 tsp vanilla extract
1 19-oz (540ml) can crushed pineapple

Preheat oven to 350F (175 C). Lightly oil two 8-inch pans and set aside [any pans will do, we didn't have same size pans so didn't end up layering the cake but had two of them instead :P ]. In a large bowl, stir together the flour, baking powder, baking soda, and salt. Set aside. In a food processor, blend together the margarine, sugar, tofu, "milk", and vanilla until smooth. Add pineapples and tofu mixture into the flour mixture and stir together until "just mixed". Spread evenly between the two cake pans and bake for 30-35 minutes or until a toothpick or knife comes out clean. Let cool 10-15 minutes before removing from pan. Let cool completely before frosting.


Frosting:
1 cup vegan "cream cheese"
1/4 cup vegan margarine
1 tsp vanilla extract
2 cups icing sugar
6 tbsp shredded coconut, unsweetened (optional)

In a food processor, blend the "cream cheese", margarine, vanilla, and icing sugar until smooth. Sprinkle coconut on top.


Kelly, Milo, Daniel and me got together last night and made this cake, and let me tell ya it's pretttty gooood! The recipe is from La Dolce Vegan. (You should check out the website, the lady behind the book is adorable.)

How to Cosplay: Make an Arm warmer

CF2010D1-083This article focus on making the base of an Arm Warmer that is seen on many of the characters from the enormously popular Music Program; Vocaloid.

Tools & Materials Needed:

  • Fabric
  • Bias Tape
  • Elastic Band
  • Fabric chalk
  • Scissor
  • Sewing Machine
  • Thread & Needle


    Instructions:
     

    1) Measure

    Length = Length of your arm warmer ( roughly Elbow to Wrist)

    Arm Width = Circumference of your upper arm

    image


    2) Draft

    Fold your fabric in half and make sure the inner fabric is facing out. Following your own measurements, draft your pattern onto the fabric.

    imageimageimageimage

    3) Cut

    Make sure you leave 1/2” allowance at the edge then cut the pattern out. image

    4) Interlock the edge

    Interlock the fabric if you have the machine because interlocking fabric helps your garment stay in place longer and of course, combat frays.

    5) Sew the curve edge

    Here we will tackle the raw edge on the curve. Fold the edge of the curve 1/2 inch inwards and sew it down.

    image

    6) Sew the Bias

    Vocaloid Arm Warmers have a strip of colour on both ends. This is the step to sew the bias on to both ends.

    image

    7) Sew the edge

    Flip to the inner side and fold you arm warmer in half again. Sew along the black dashed line. After you are done, flip it inside out and your arm warmer will start to take shape.

    imageimageimage

    8) Sew the Elastic Band

    Now we will sew a tube along the edge at the top of the arm warmer and insert an elastic band into it.

    imageimageimage

    Fold 1” inch of fabric from the top down, Fold along the entire circumference. 

      image

      As I’ve explained in the video, what we’re doing now is something like folding a tube around the circumference of the arm warmer. The tube will allow us to insert the elastic band into it and thus making our arm warmer into something similar to an elastic skirt.

      imageimage

      Sew along the black dashed line but remember to leave a bit of gap so you can insert your elastic band through the gap. Lastly, attach your elastic band to a safety pin and thread it through the gap. Finish by sewing or tying both ends of the elastic band together.

    • How to Cosplay: Make an Arm warmer

      CF2010D1-083This article focus on making the base of an Arm Warmer that is seen on many of the characters from the enormously popular Music Program; Vocaloid.

      Tools & Materials Needed:

    • Fabric
    • Bias Tape
    • Elastic Band
    • Fabric chalk
    • Scissor
    • Sewing Machine
    • Thread & Needle


      Instructions:
       

      1) Measure

      Length = Length of your arm warmer ( roughly Elbow to Wrist)

      Arm Width = Circumference of your upper arm

      image


      2) Draft

      Fold your fabric in half and make sure the inner fabric is facing out. Following your own measurements, draft your pattern onto the fabric.

      imageimageimageimage

      3) Cut

      Make sure you leave 1/2” allowance at the edge then cut the pattern out. image

      4) Interlock the edge

      Interlock the fabric if you have the machine because interlocking fabric helps your garment stay in place longer and of course, combat frays.

      5) Sew the curve edge

      Here we will tackle the raw edge on the curve. Fold the edge of the curve 1/2 inch inwards and sew it down.

      image

      6) Sew the Bias

      Vocaloid Arm Warmers have a strip of colour on both ends. This is the step to sew the bias on to both ends.

      image

      7) Sew the edge

      Flip to the inner side and fold you arm warmer in half again. Sew along the black dashed line. After you are done, flip it inside out and your arm warmer will start to take shape.

      imageimageimage

      8) Sew the Elastic Band

      Now we will sew a tube along the edge at the top of the arm warmer and insert an elastic band into it.

      imageimageimage

      Fold 1” inch of fabric from the top down, Fold along the entire circumference. 

        image

        As I’ve explained in the video, what we’re doing now is something like folding a tube around the circumference of the arm warmer. The tube will allow us to insert the elastic band into it and thus making our arm warmer into something similar to an elastic skirt.

        imageimage

        Sew along the black dashed line but remember to leave a bit of gap so you can insert your elastic band through the gap. Lastly, attach your elastic band to a safety pin and thread it through the gap. Finish by sewing or tying both ends of the elastic band together.

      • Blog Archive